This article shows you how to set up a Product like our Business Card Demo.
A) Create the A product in Template Library
OPTION 1:
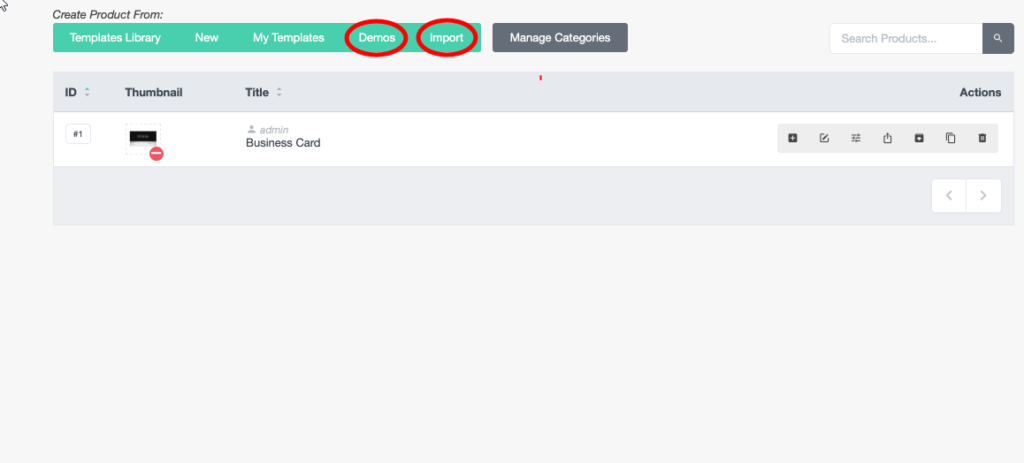
Download and Import Demo
Our Business Card Demo can be downloaded within the Products section of the Fancy Product Designer Plugin.
After downloading, you can import the zip file so the Business Card template will show up in the products section.
You still need to set the Canvas size you like to get (Please see Step 8).
OPTION 2:
If you like to create the Product on your own please follow these steps:
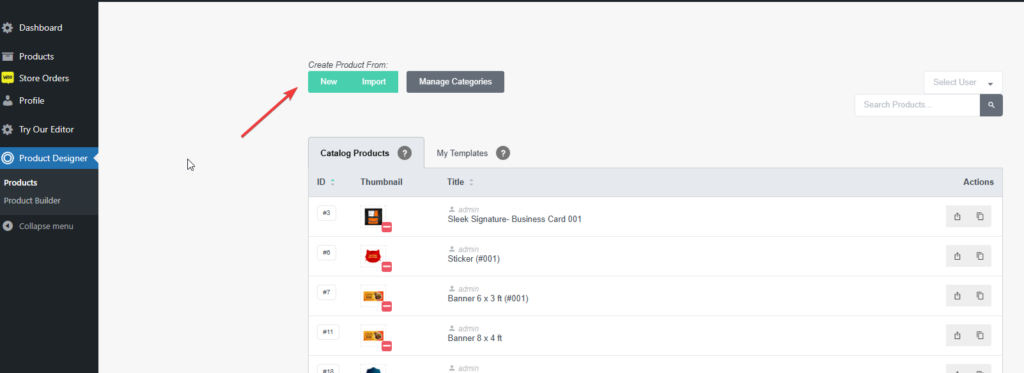
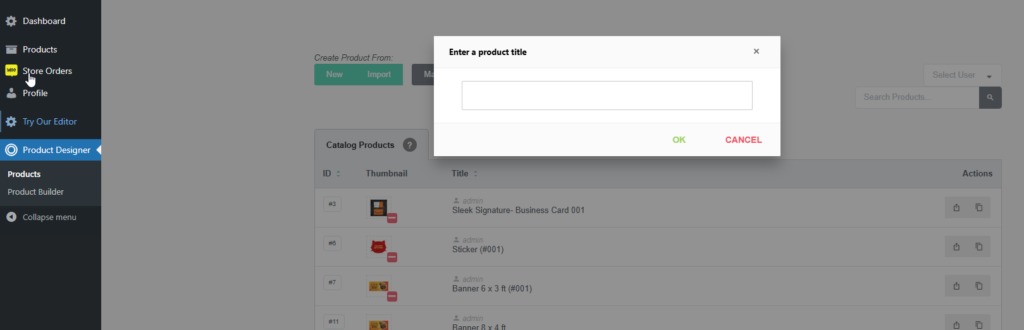
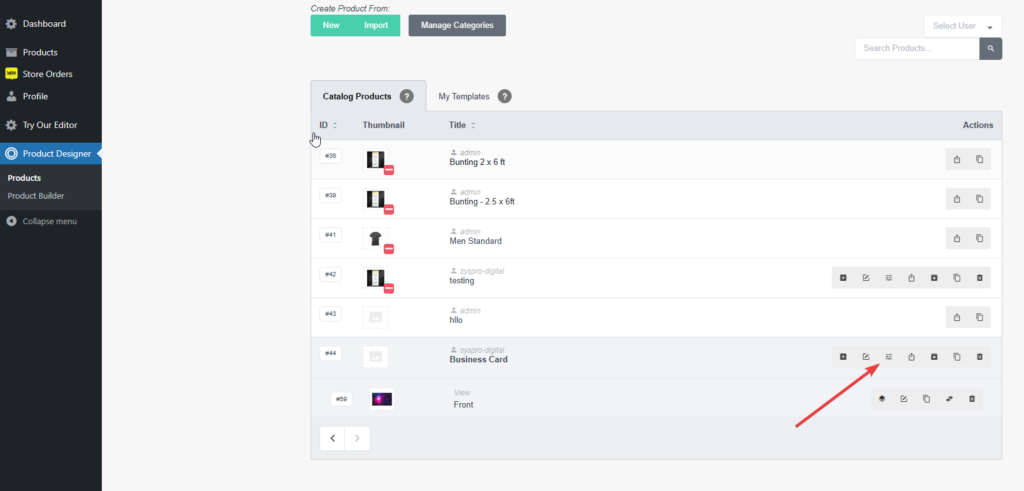
1. Go to Creative Templates and create a New Product
2. Enter a Product Title
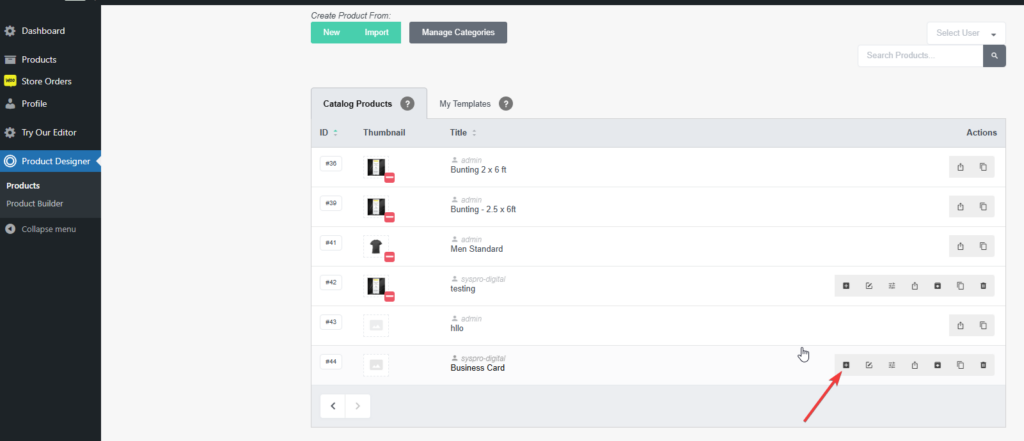
3. Add a View to the Fancy Product
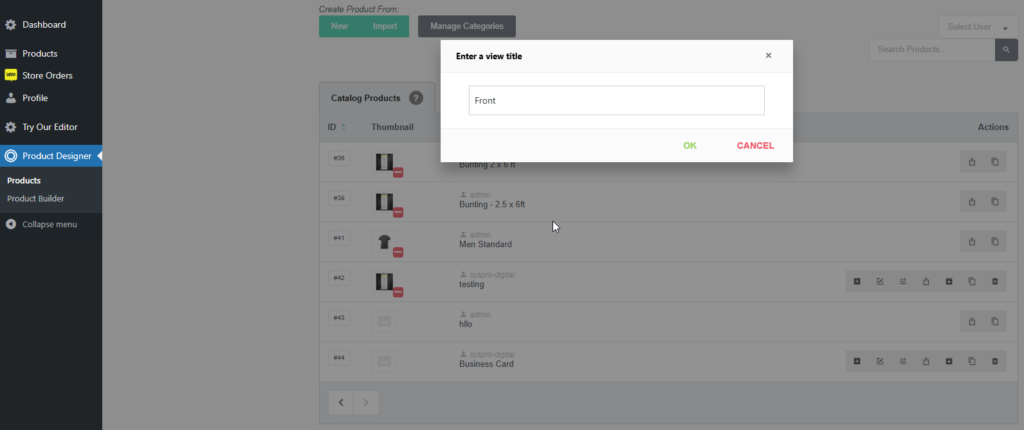
4. Enter a view title
5. Select a thumbnail for the view

6. Add a thumbnail for the product

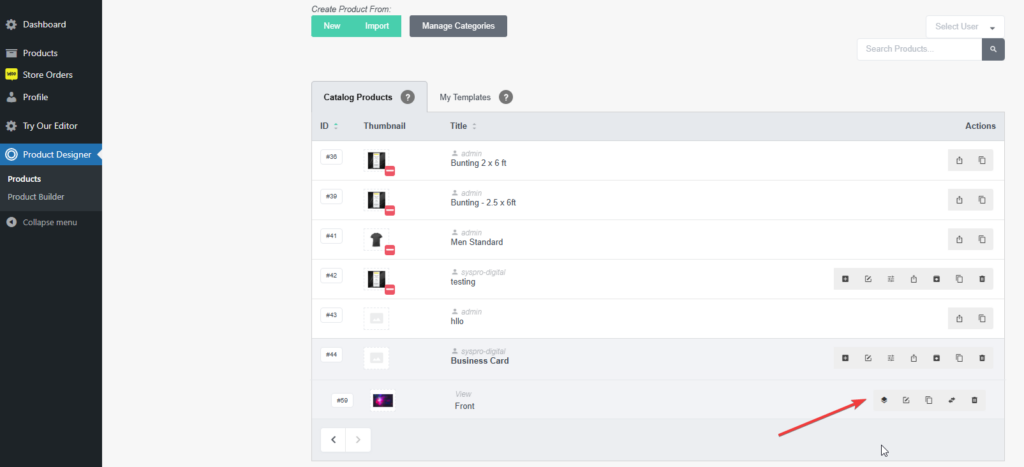
7. Edit View in Product Builder
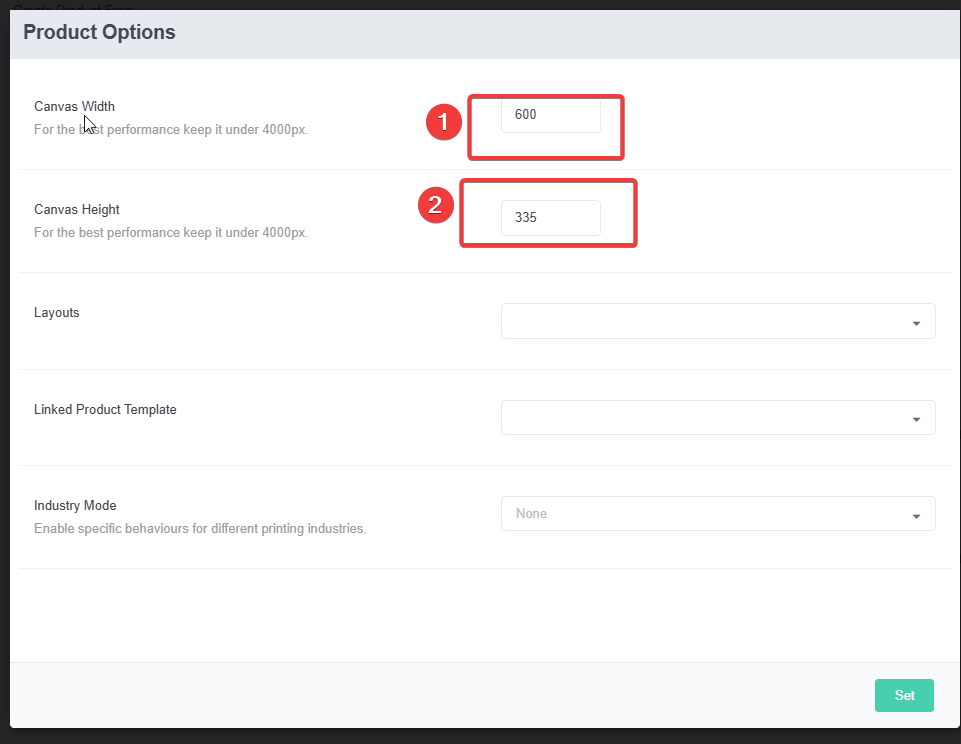
8. Edit Product Options and set Canvas Size to 600 x 335 pixel
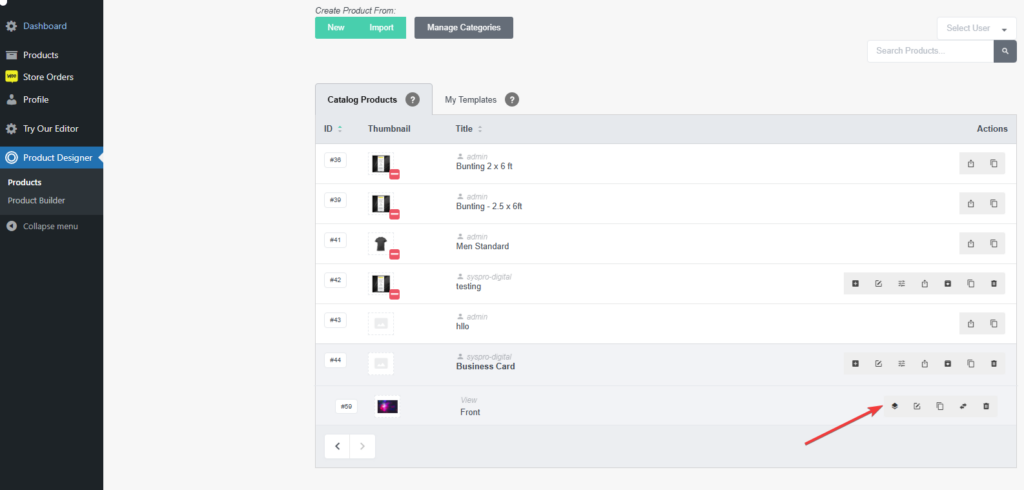
9. Edit View in Product Builder
10. Upload Layers (Images, Texts, Curved Texts, Text Boxes or Upload Zones)
You can get an overview of the layers we use as well as the settings when downloading and importing our Business Card demo (for more information please see OPTION 1)
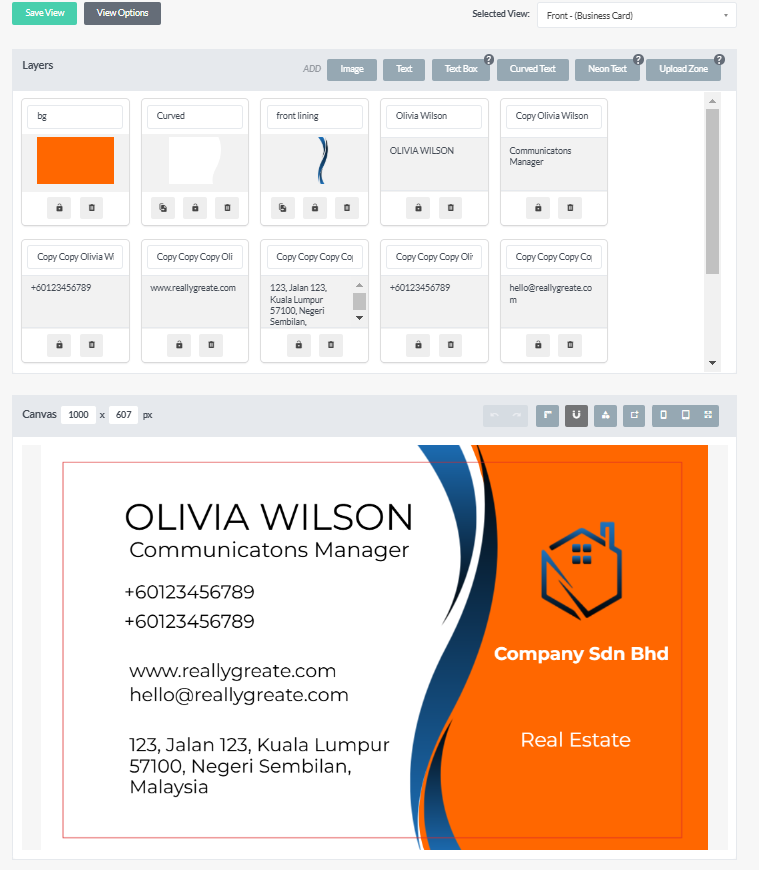
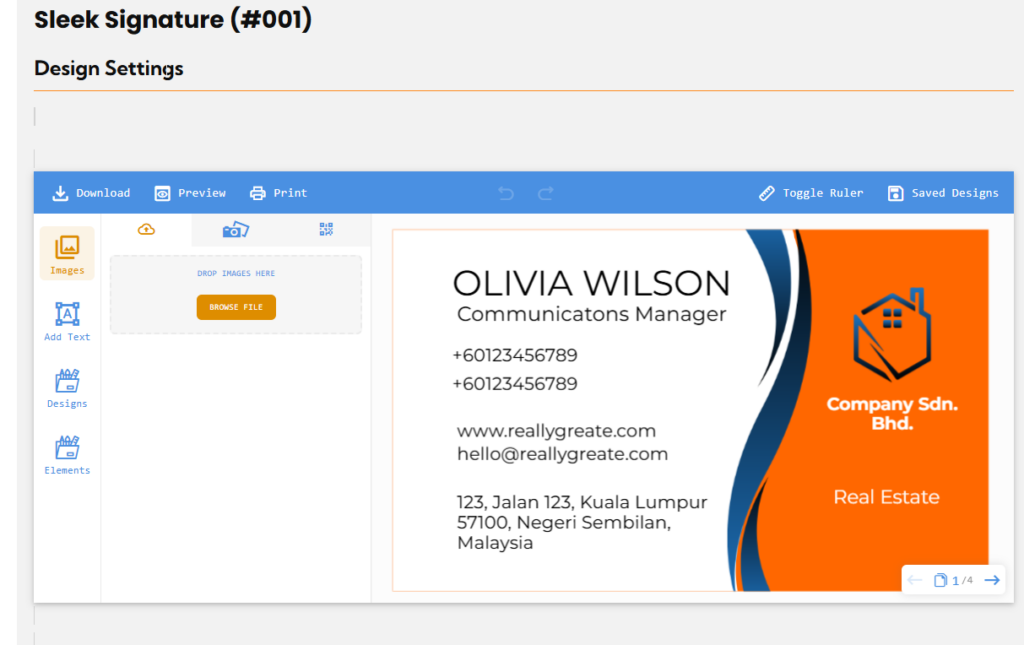
Images
We use a background image (png file with enabled color palette).
On top of that we use a grid (semi transparent png overlay, no color options enabled).
On the bottom of the Business Card there are two different image layers that are set up accordingly (base image and png overlay)
Between the top and bottom of the Business Card there is a line as an image.
Texts
On the left side of the Business Card you can see two separate text fields.
On the right side there is a Text Box with a preset width.
All Text and Text Box elements are customizable and use the colorization method color palette.
If you want to use fonts that are not available in the product builder yet, please have a look at this guide.
Please remember to click on “Save View” to save your setup.
B) Connect the Fancy Product to a Store (MarketPlace)
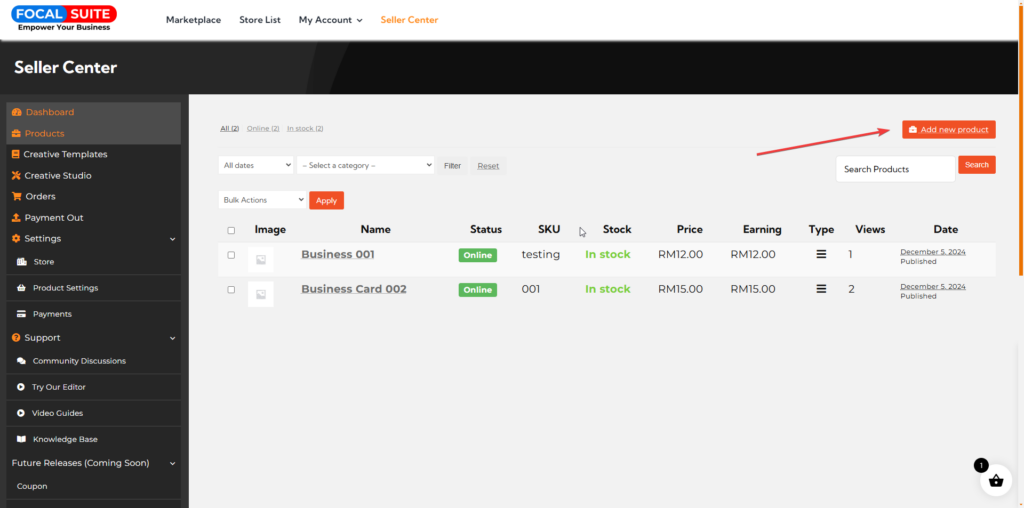
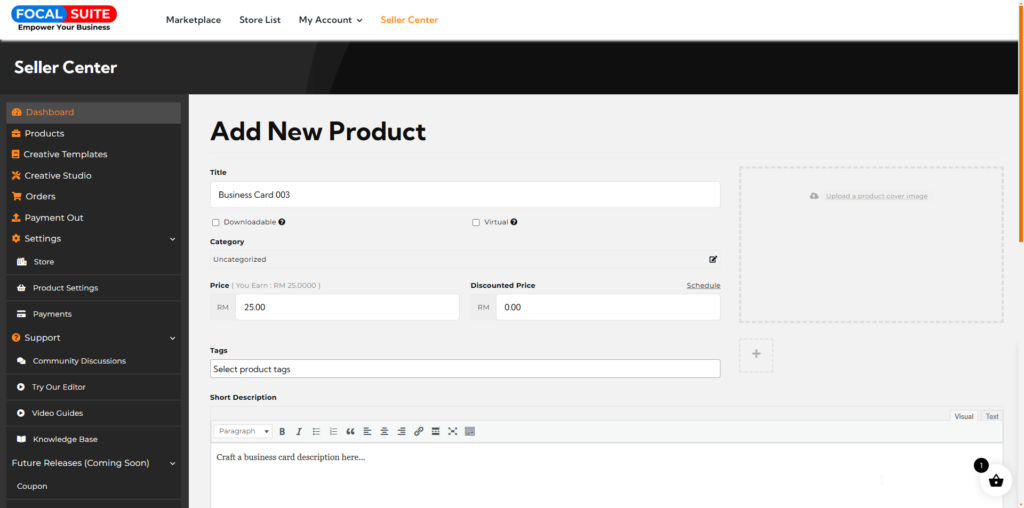
1. Create a Product (Seller Center)
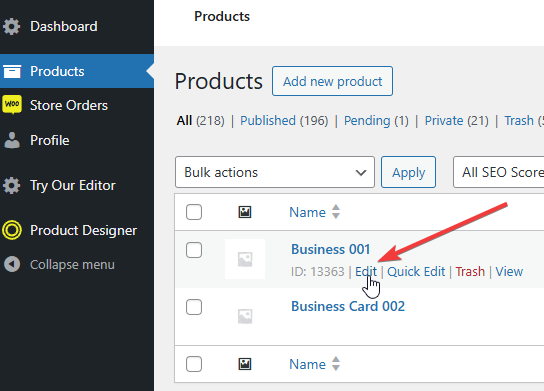
3. After Create Product, go Product Setting to Link Product with From Creative Template
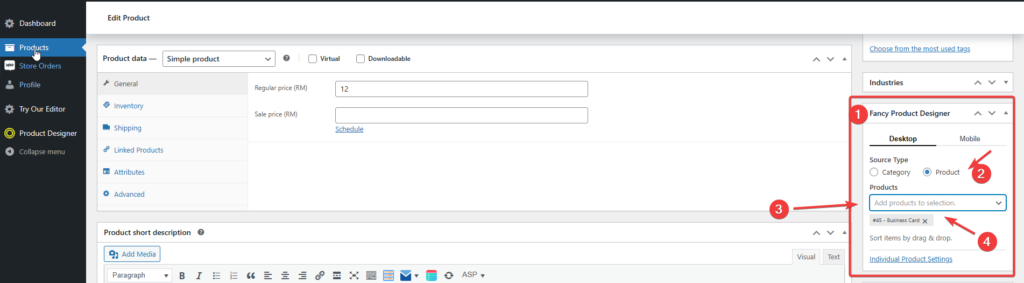
2. Edit and Assign creative template and link to product that previously created
D) Outcome
Depending on your theme, the style of the input and dropdown fields can vary. The theme we are using on our demo for example is X-Theme.
Please check out the example link here.