Create a Custom Product Using Creative Studio
Custom Products are the customizable items that can be created in the Creative Studio and listed as products in your store. They can include multiple views, such as the front and back sides of a t-shirt. Options for color, size, and other attributes can also be added.
- To create a new product:
- Click New to add a product.
- A popup will appear, prompting you to enter a product title.
- The new product will now be listed first in the table. You can assign a thumbnail by clicking the empty thumbnail box to the left of the product title.
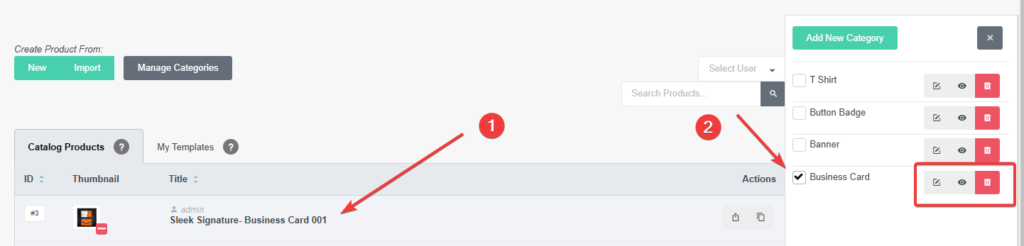
- Assigning the product to a category (optional):
- Open the Manage Categories pop-up on the right.
- If no category exists, click Add New Category and enter a title.
- Once the category appears, select the product from the product list, then check the box next to the category title to assign the product.
Each category features icons on the right for editing the title, filtering the product list, and deleting the category. Note that each product can belong to multiple categories.
Add View(s) to a Custom Product
Each product must have one or more views assigned. A view displays different angles or sides of a product, such as the front and back of a shirt.
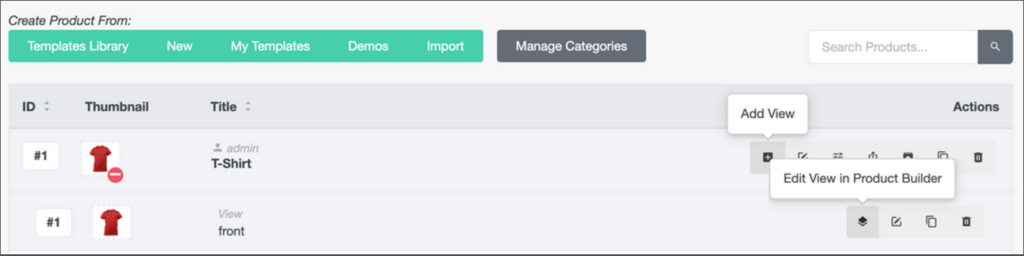
- To add a new view:
- Click the plus icon to create a new view for the product.
- Enter a title for the view in the popup.
- In the next window, select a thumbnail for the view.
To see a list of views for a product, click on the product’s name. Click again to hide it.
Build Your Initial Product
In the Creative Studio, you can add initial images and text elements to design your product.
- Go to the Creative Studio page by clicking the Layers icon (“Edit View in Creative Studio”) in the views list, or by selecting Creative Studio in the main navigation.
- Select a view to edit from the “Selected View” drop-down.
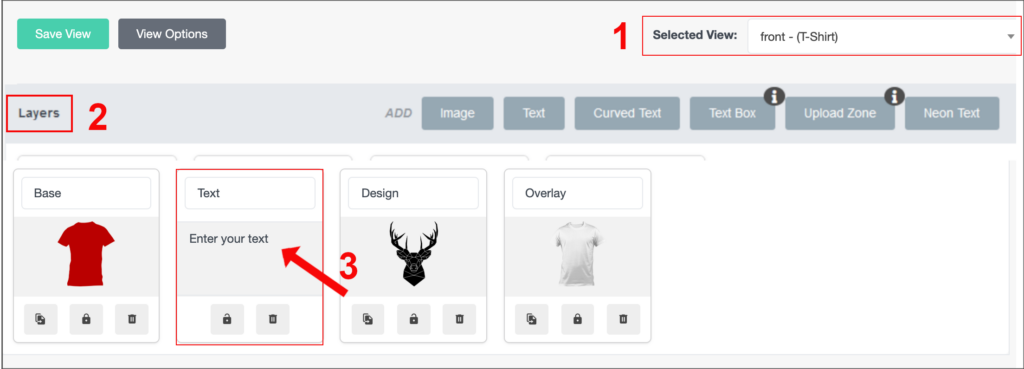
- Adding elements:
Use the Layers panel to add image or text elements. Options for customization are shown in the accompanying video. - Customizing elements:
Adjust options for each element individually. Select an element in the Layers list (or Upload Zone), or click directly on the element in the main Product view. This opens the Layers Options panel.
Through the Layers Options panel, you can modify properties and behaviors of each element. For further details, refer to the comprehensive guide on Element Options.